
Module Three
Surface vs. Pattern
aah-ah-ahh-ahhh

Click Me

Filippo Lippi, Annunciation, 1459, Florence, Palazzo Medici Riccardi
Reflection
In Module Three, each student was given a square cut out of a famous painting interpreting the Annunciation, as well as a 3D model of a part of Tasmanian terrain, and we were tasked to represent the given sample using Rhino and Panelling Tools to build upon the terrain using a grid of 10x10 panels that we design through the iterative process of trial and error.
Given the limitation that a 10x10 grid of panels has, it would be impossible to reproduce the appearance of the cloth exactly. Instead of trying to beat this limitation through subdividing custom panels, the gird of panels can instead be seen as an opportunity to interpret and represent the sample in a lower resolution, while still maintaining the flow of the fabric, as well as the most important areas of shadows, highlights, and creases.
Having to learn a completely new software, Rhino, in this module, was challenging. Even with prior experience in CAD software such as Fusion 360, Cinema4D, and Blender, the command-line based Rhino was a change of pace, as I slowly but surely realised the convenience and efficiency of the command-line workflow, while I consolidated other aspects of my 3D modelling skills.
Sample and Terrain Analysis
The painting sample is taken near Mary’s elbow, showing part of her pink garment in the top left, while Mary’s blue cape-like garment takes up the majority of the sample. Flowing towards the bottom left, the cloth bends due to the elbow underneath, and the highlight is created by the empty space underneath the garment, while the ridges and folds are created by the arm’s weight upon the garment.
The terrain has a rather smooth appearance with subtle changes in gradient. The crest is situated on the left corner of the gradient, and the terrain gradually slopes downwards towards the right corner where the valley is situated, with the exception of a ridge running across the terrain bringing it upwards. The bottom corner has the plains, indicating a slight levelling out between the highest and lowest points.
The analysis was done within Illustrator, as I used the pen tool to help me illustrate the specific areas of shadows and creases in the sample, as well as differences in height and slope in the terrain, making it clear to myself and any viewers of the main focus of these elements, and therefore the main focus that the final product will try to represent.
Through analysis of the terrain and sample, it was evident that the most identifiable feature of the sample was the contrast between the highlights and shadows, and the elevation of cloth that these represented. The combination of the terrain and sample were done so to complement each other, as the 3-dimensionality of the terrain realizes the elevation of cloth that is inferred in the sample.
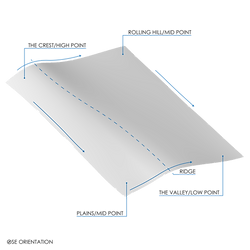
Terrain Analysis
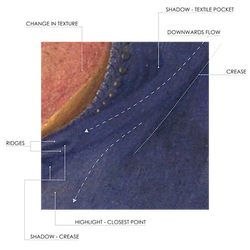
Sample Analysis
Iterative Process
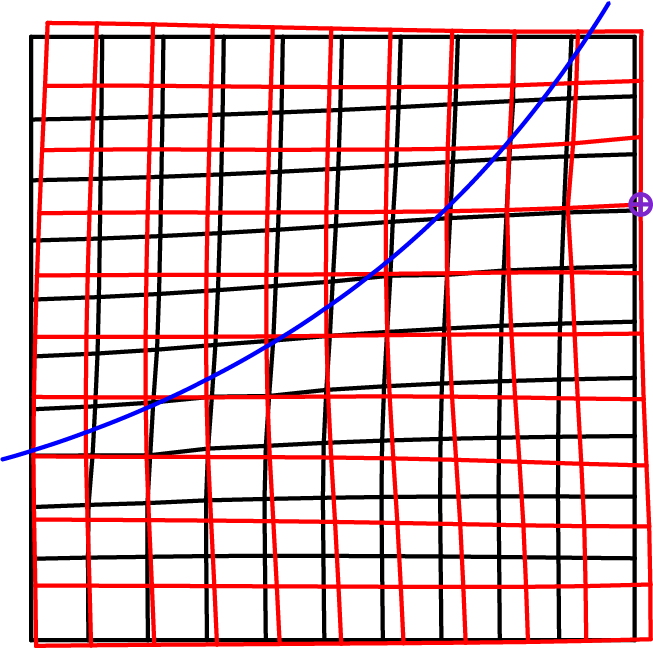
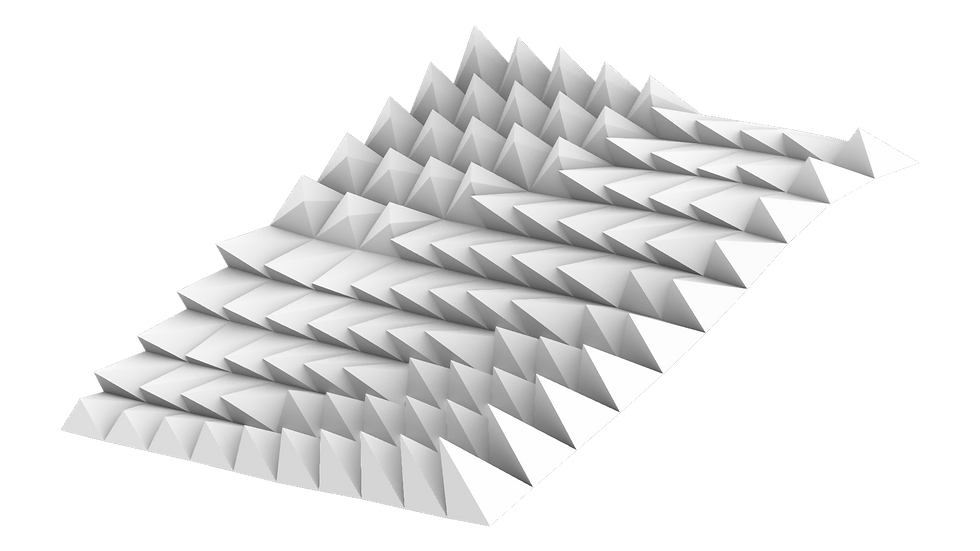
Grid Study

Grid Study

Grid Study
Grid Study
Grid Studies

Panel Study

Panel Study
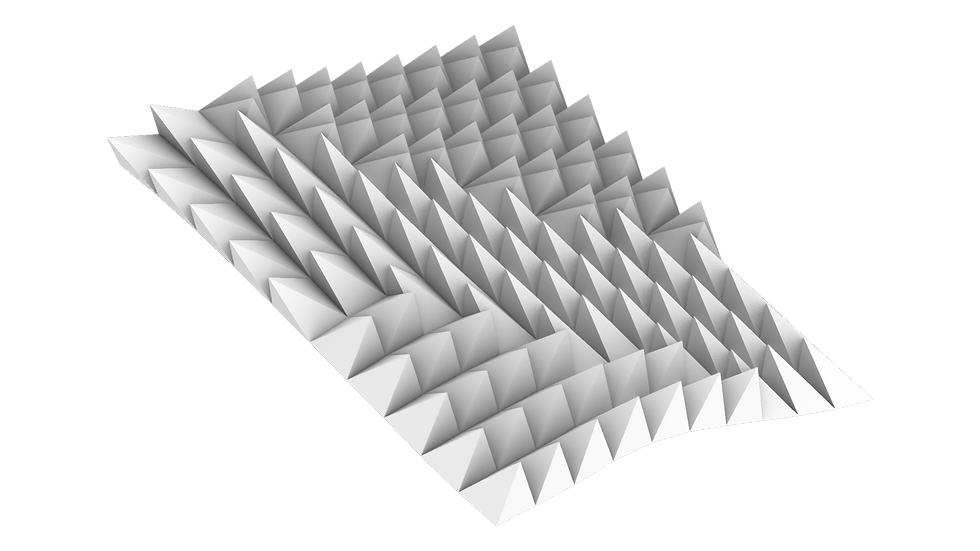
Panel Study
Panel Study
Panel Studies
Hybridisation

Hybridisation
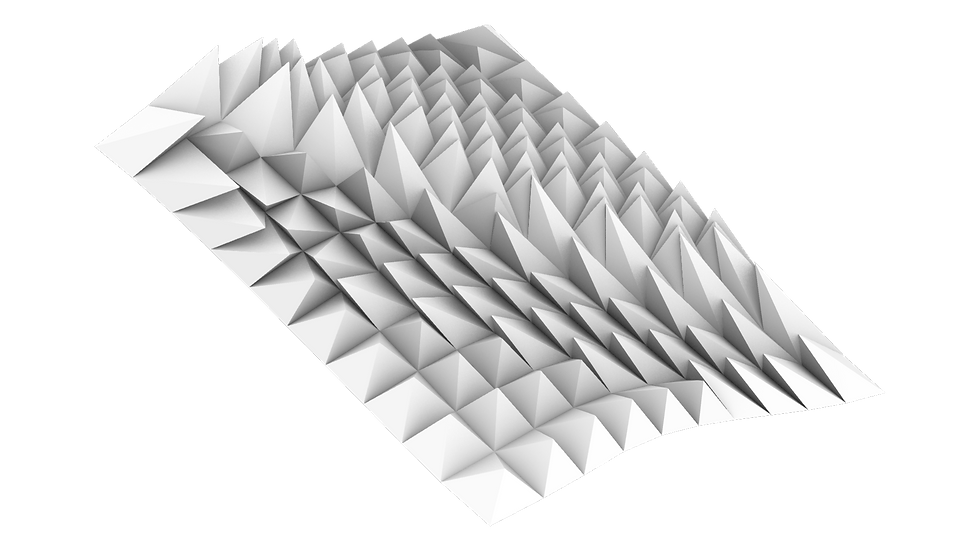
Hybridisation
Hybridisation
Hybridisation
The iterative process was largely driven by the process of trial and error, where dozens of failed iterations helped to determine what worked and what didn’t. Starting with the grid studies, iterations were chosen for how well they could follow the flow that the sample fabric had, as different attractors were tried for their different effects. The panel studies were also a constant battle with attractors and custom panels, figuring out which shapes worked the best in what order. Finally, the hybrids posed the most challenging iteration to get right, as grids and panels were mixed and matched, their overall suitability, as well as developability, had to be taken into account.
Throughout the iterative process, different orientations of the terrain were also tried in order to find the one that would compliment the direction of panels and shapes of grids the best, as well as provide the most similarities to the sample.
Final Iterations
Grid Study

Panel Study

The Hybrid

The Artefact
Developing and Unrolling Panels

Unrolled Panels
One of the main focuses of this module was the developability of the panels that we designed, as in the past it was important for the physical deliverable of this assignment, where students had to print out the panels and physically put together their hybrid. Due to the limitations of the pandemic, our cohort was not required to build our hybrid in real life, however, we were still required to learn the importance of developability, as well as efficient use of space, in order to be able to apply this in the future in an analogue medium.
The Composite
After bringing the outline of the artefact into Illustrator and defining its lineweights, I brought it into Photoshop and combined it with the sample. As the artefact extends outside the bounds of the original sample, i used the content-aware fill tools in Photoshop in order to fill in the empty space, making the composite ook complete, almost like it had been taken directly from the original painting.
Combining the artefact and the sample, being a 3-dimensional surface and a 2-dimensional pattern respectively, brings coherence to both of the pieces, and the motivation behind the exploration of Surface vs. Pattern. The artefact portrays the 3-dimensional aspect of the surface particularly well on its own, however, in its plan view within the composite, it benefits greatly from the pattern that the sample brings to the table. The two elements at play here provide each other with context, essentially filling in the gaps of information that the artefact and sample cannot convey on their own. The composite brings out the hidden aspects of 3-dimensionality in the 2-dimensional painting, and as a result, the 2-dimensional image starts to take on a life of its own, appearing both 2D and 3D at the same time.

Sample Analysis
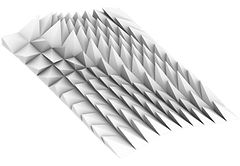
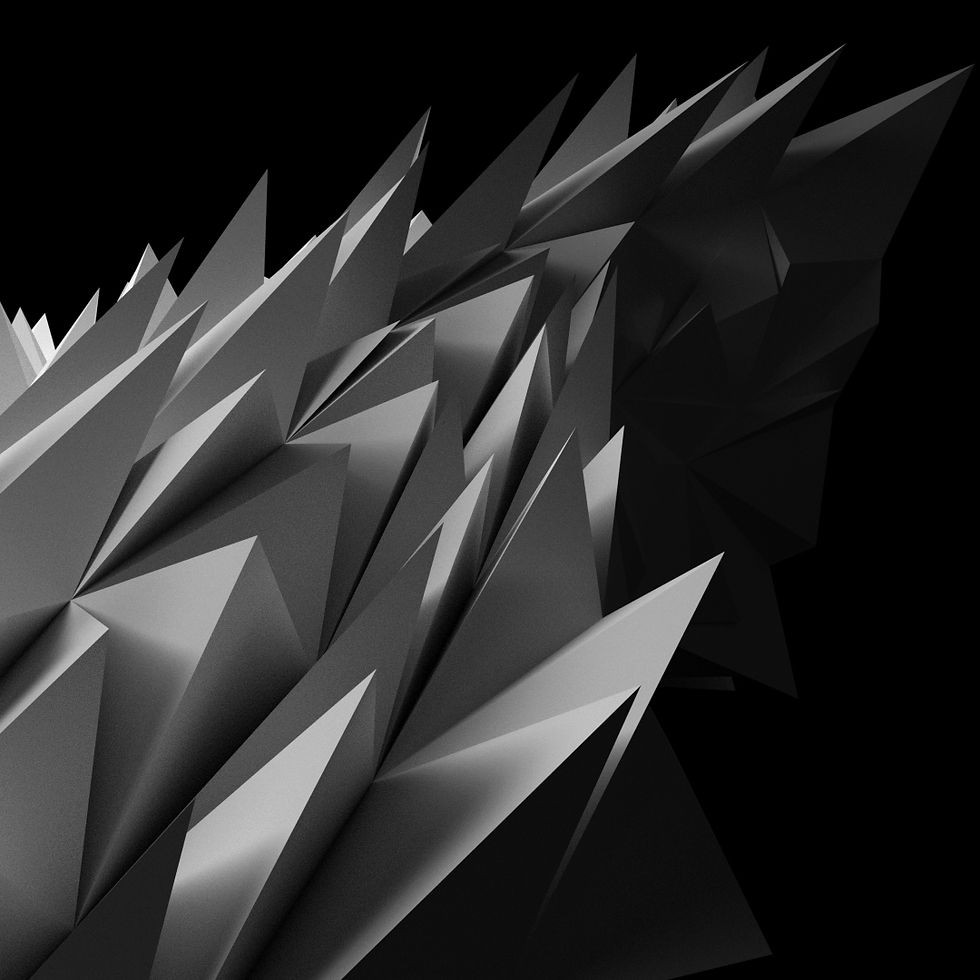
Renders and Final Renders

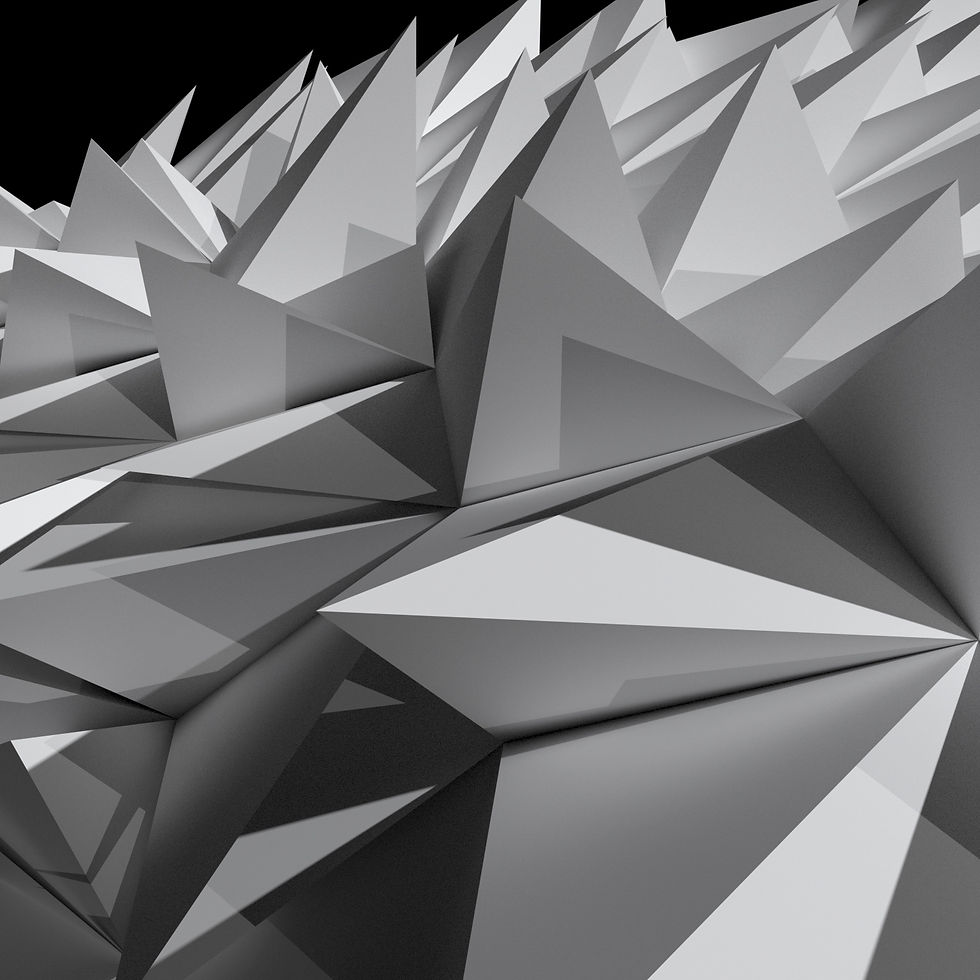
Final Hybrid Render

Final Artefact Render


Rendering Iterations
My favourite part of the module was the renders, as these allowed the artefact and hybrid to be shown at any angle. In the process, I learned how to set up lights in Rhino to light up the scene and object for the best effect, and how to frame the object within the square. Once again, there was a lot of trial and error involved in this process, with many iterations of angles and lighting conditions. I feel that I achieved a pretty good balance of light and shadow that showcase the main areas of my artefact and hybrid well in a less restricted condition compared to isometric views, as this gave an opportunity a perspective view of them.
Final Submission


Final Revised Submission